I spent about 3 solid work days attempting to import 2048 bit RSA certificates signed by Comodo/InstantSSL. So to save you guys some frustration I decided to write a document that covers what worked for me.
These directions assume you have:
-
Ubuntu Server 11.04 + GNOME (what I was using but I’m sure other versions may work as well)
-
Java JRE 1.6 (although 1.7 works as well)
-
OpenFire 3.7.1
**Step 0 - Purchase the Certificate
**
The certificate verification process may take a while so I’d recommend purchasing your certificate first.
From instantssl.com purchase the InstantSSL. Make sure to choose “OTHER” for the dropdown menu for Web Server and choose the 2048-bit RSA product.
Step 1 – Install and configure JRE 6
**
**
For Ubuntun 11.10+ (skip to “directions continued” if you are using 11.04):
I managed to install Sun Java in 11.10 by using partner repository from 11.04:
sudo add-apt-repository "deb http://archive.canonical.com/ natty partner"
sudo apt-get update
Directions continued:
To install Java 6 JRE, simply do:
sudo apt-get install sun-java6-jre
“Enter Password”
The JRE will be installed automagically
Next, we want to make sure JRE 6 is the default for java on our server.
sudo update-alternatives --config java
You may also have OpenJDK installed instead of the Oracle JRE. Be sure to select the option corresponding to /usr/lib/jvm/java-6-sun/jre/bin/java (option 2 on my server).
Optionally, you can install Java 1.7 on Ubuntu using this guide. I have just set up another OpenFire server using 1.7 and “so far” no problems. Here is a link to the original Java 7 for linux (not update 1).
Step 2 – Install OpenFire
Install OpenFire using the Debian package. Other install methods will likely result in the directories being different from this guide. So keep that in mind if you used the manual tar method.
Step 3 – Delete Existing Certificates
Log in to your Openfire server at http://yourdomain:9090 via a web browser
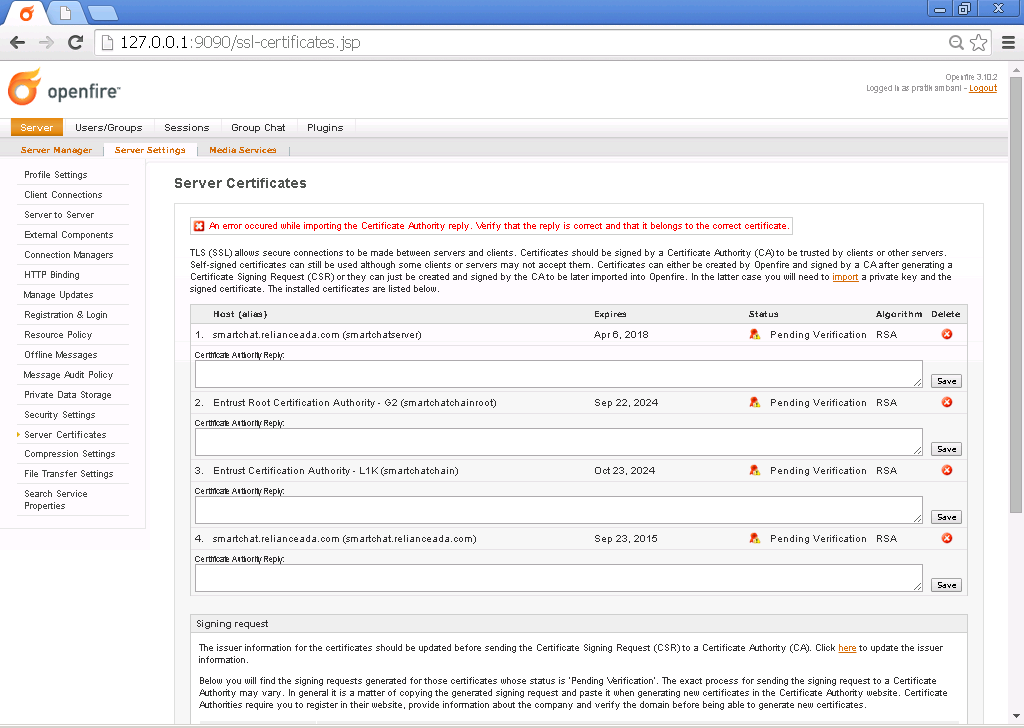
Under “Server Settings” select “Server Certificates”
Delete the auto-generated RSA certificate. Leave the DSA certificate alone since some clients may require it. OpenFire will warn you about missing the certificate but you can safely ignore that.
Step 4 – Install JCE Unlimited Strength Jurisdiction Policy Files 6
You cannot use higher forms of encryption with the standard JRE (why Oracle, why?).
**
**
Download the files from http://java.sun.com/javase/downloads/index.jsp
Copy the files US_export_policy.jar and local_policy.jar to /usr/lib/jvm/java-6-sun/jre/lib/security overwriting what already exist. Be sure to retain the permissions the old files had (right-click on file, choose properties, then permissions tab, and make sure the user and group are set to openfire).
Java 7 also requires this pack as a separate download specific to version 7. The directions are the same except for the directories.
Openfire will continue to use the old JRE until its environment variables are updated. I was too lazy to do this, so I rebooted my server. This worked for me!
**Step 5 – Set Permissions and Ownership
**
The private key will be generated inside the Java keystore file located in the directory /usr/share/openfire/resources/security/ . Although, the security folder is just a pointer to /etc/openfire/security/ .
The Debian installer automagically creates a user and a group named “openfire”. All the permissions for directories and files created by the installer will have their ownership set to openfire. Make sure to go to Users and Groups and set the user you are logged in as is part of the openfire group. You may have to log out and then back in for these settings to take effect (although I’m sure there’s some Linux command I don’t know that’s faster).
Step 6 – Generate Private Key
OpenFire auto-generates a private key within the web admin but I doubt it’s 2048 bit, so you are forced to use java keytool. I discovered an odd thing with OpenFire at this point. The default password for the OpenFire keystore and truststore is “changeit”. I attempted to change the password using this method but it did not seem to matter when it came to generating the private key. I found that if I set the private key’s password to anything but “private key” that OpenFire would claim that the keystore’s certificates had been corrupted. I tried many combinations of settings so I feel pretty safe in saying this. So for the purpose of this guide I will assume OpenFire 3.7.1 has a bug and that you will need to use the password “changeit”.
a. Open a Terminal window
b. cd /etc/openfire/security
c. sudo keytool -genkey -keyalg RSA -keysize 2048 -keystore keystore -alias yourdomain.com
d. enter root password
The following questions will be asked if not known:
Enter keystore password: changeit
What is your first and last name? - This is the Common Name (Domain Name), not a person’s name (e.g. yourdomain.com)
What is the name of your organizational unit? companyname
What is the name of your organization? companyname
What is the name of your City or Locality? yourmama
What is the name of your State or Province? FAT
What is the two-letter country code for this unit? US (assuming america)
    You will then be asked if the information is correct:
    *Is CN=www.yourdomain.com, OU=Your Organizational Unit, O=Your Organization,         L=Your City, ST=Your State, C=Your Country correct?*
When you answer ‘y’ or ‘yes’ the password is then requested:
Enter key password for : changeit
Step 6 – Submit the CSR
Reset your OpenFire server with this command in the terminal:
sudo /etc/init.d/openfire restart
Log in to your Openfire server at http://yourdomain:9090 via a web browser
Under “Server Settings” select “Server Certificates”
You should see your self-signed certificate in the list now. If not…god help you.
At the bottom of the page OpenFire “should” generate the code for a Certificate Signign Request (CSR). Use a web browser and go to:
https://secure.comodo.com/products/
Log in at the top right.
Click on SSL Certificates.
You should see your SSL Cert listed and a button for Add CSR. Copy and paste the CSR code from the OpenFire web admin into the Comodo popup.
Call Comodo at (888) 266-6361. Choose Option 4 for the Verification Team and then option 1. Talk to (hopefully) knowledgeable operator and get your certificate verified.
Refresh the web browser for Comodo in the SSL Certificates management page. Click “Download as .zip”
**Step 7 – Install the Certificate Authority Reply
**
The .zip file will be named yourdomain.zip
Use the GUI-based Archive Manager to extract these 3 files to /etc/openfire/security/
yourdomain.crt
AddTrustExternalCARoot.crt (the root in the certificate chain)
COMODOHigh-AssuranceSecureServerCA.crt (the intermediate in the certificate chain)
Using a text editor create a file named combine.crt in /etc/openfire/security/ . You need to combine the code from all 3 .crt files in order to create a complete chain that OpenFire can successfully read. Importing the .crt files one at a time using keytool will not work, since it will not be interpreted as a complete Certificate Authority Reply.
First, copy and paste ALL the code from AddTrustExternalCARoot.crt into combine.crt. Put one carriage return (Enter key on keyboard) between each section of code. Then paste in COMODOHigh-AssuranceSecureServerCA.crt . Then finally yourdomain.crt . Save combine.crt.
I assume at this point the terminal window is still open at /etc/openfire/security/
In the terminal type
sudo keytool -import -keystore keystore -alias yourdomain.com -file combine.crt
Enter “changeit” for the keystore password
Enter [y] for yes.
Keytool “should” give you a message that you imported a certificate authority reply.
sudo /etc/init.d/openfire restart
Browse to your Openfire server at http://yourserver:9090
Under “Server Settings” select “Server Certificates”
If everythign went right then under the Status column you will see “CA Signed”. Angels will descend from heaven, inspiring you with a beautific chorus. If you do not see angels, do not worry. Your OpenFire Server is now set up properly with a signed SSL certificate.
Step – Optional Setup Options
As I noted I tried changing System Properties with no luck. But just in case it helps you…
Browse to your Openfire server at http://yourserver:9090
Under “Server Manager”, select “System Properties”
Add/edit the following properties with the following values:
Property Name – Property Value
xmpp.socket.ssl.active – true
xmpp.socket.ssl.port – 5223
xmpp.socket.ssl.storeType – JKS
xmpp.socket.ssl.keystore – resources/security/keystore
xmpp.socket.ssl.keypass – changeit
xmpp.socket.ssl.truststore – resources/security/truststore
xmpp.socket.ssl.trustpass – changeit
I personally did not need to set any of these variables. As noted before I tried changing the keypass variable and that made no difference.
Extras
Guides I found useful (and which this document is based upon):
http://www.hhsn.net/blog/?p=180
http://www.igniterealtime.org/builds/openfire/docs/latest/documentation/ssl-guid e.html
https://support.comodo.com/index.php?_m=knowledgebase&_a=viewarticle&kbarticleid =244